
Adding lead information in Zoho CRM and Master List
- Daniel Kalman
- Aug 3, 2023
- 4 min read
Updated: Aug 20, 2024
Student support specialist to watch this video to know how to add student lead information in Zoho CRM.
How we get our leads
We have 5 ways to get new lead information:
Lead calls the dance line
Lead sends us an inquiry through contact form/email
Lead registers to our program without paying
Lead messages us through social media channels
Lead finds us through external listing platforms such as Classpass and Eventbrite
To date, we have 4 websites in Los Angeles which we use as lead source:
Creating new lead Record
Go to "Students" tab in Zoho CRM.
Click "Create Student" button on the upper right corner.
Or you can also click the "+" icon and create student record from there.
Start adding lead information then save.


Updating individual student record
Select the student record you want to update.
Click the field you want to update. When done, select the blue check mark icon to save.
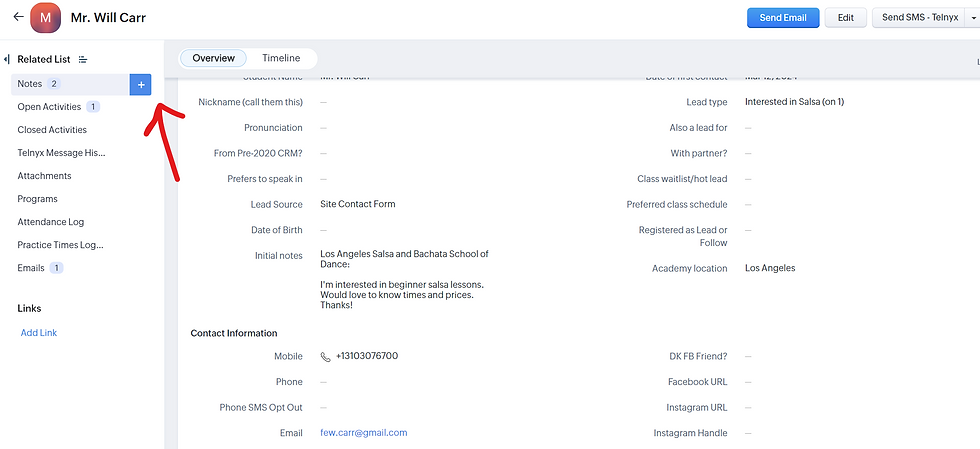
To add notes, scroll down to the bottom of the student record until you find the Notes section. Or you can also hover your mouse pointer to "Notes" on the left sidebar entitled Related List and click the "+" sign.
All new unpaid leads will need to have an action plan. Go to Open Activities section and click "Schedule Call" to create reminder for follow up.


Transcribing audio notes after initial sales contact
Initial sales contact is when Danny or the sales representative has spoken to the lead over the phone. They will share what happened when they tried reaching out to the lead in the student support group chat (in Signal). Student support will update the CRM record of the student based on this update.
If the update comes from Danny, he'll typically send a voice message. Transcribe it using your laptop's Live Caption built-in feature and use Snipping Tool to create a screenshot of and extract text from image.
After getting transcribed text, add to Notes and schedule follow up call.


Marking a student as hot lead
We classify a lead as "Hot lead" when they're 80% close to paying/joining the full program. There are two steps to mark a lead as hot lead.
Using Tags
Go to the student's CRM record.
In the header section, under the student name, click "Add Tags"
Select an existing tag or create a new tag in this format: YYYY-S# Hot Leads - LA (e.g. if the hot lead is for Season 2 of 2024, tag is "2024S2 Hot leads-LA")
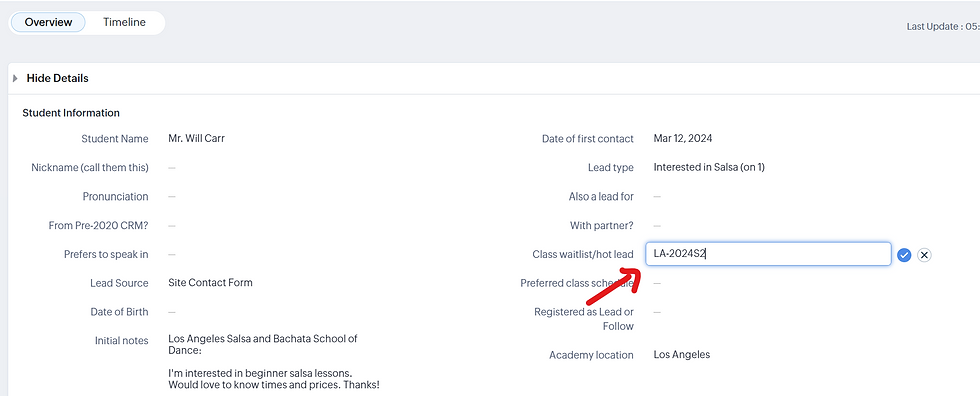
Using CRM field
Go to the student's CRM record.
Edit "Class waitlist/hot lead" field and write the year and season code they're hot lead for. (e.g. if they're hot lead for salsa 101 program for Season 3, write "LA-2024S3 Salsa 101". If they didn't specify what program they want, write "LA-2024S3")


Update:
In August 2024, when a hot lead (excluding unpaid registrations) is added to Google Sheets, please include a note specifying the reason they made it there.
For unpaid registrations, we should also include a note indicating the status as "unpaid." This helps Danny and the team distinguish between students who have partially registered and those who are hot leads but have not yet registered.
Following these steps helps us when sending campaigns or follow-ups, as it provides context and allows us to communicate with each student more effectively.

Triggering automatic replies to new contact form leads
When we receive new leads from site contact form, we want to automatically send them an email response to text the director or the sales rep so they can get connected. If the lead takes an action afterwards, it just means that they are 100% serious about joining the class, making them a very hot lead who just needs a little more push to convert them from being a prospect into a paying student.
Since we have multiple websites for lead generation, the automated emails should come from the address of the academy that they originally reached out to. We have CRM workflows already set up to make that happen. It just needs to be triggered so it can send the right email to the new lead.
To see how the workflows are configured, you may go to Settings > Workflow Rules (under Automation tab) and select which contact form workflow you want to check.
Trigger steps:
1. Go to the student record and click "Edit"
2. Lead Source should be modified to "Site Contact Form".
3. Update "Date of First Contact". 4. Initial Notes content must be in the same format as the message you sent to the director on Signal. Format below:
Salsa & Bachata Dance School LA - {School Name}
2024-04-05 15:10:20 - {Timestamp}
Andrea Dominguez - {Lead name} ada_andy93@msn.com - {Lead email}
(213) 2157031 - {Lead mobile}
"Hi, My name is Andrea and my partner and I are interested in taking Salsa classes. We are both beginners and we would prefer private classes. What would be the cost and what is the availability during the weekend? Thank you" - {Lead message}
5. Click Save. Note: Steps 1-4 require content modification. When we say modify, it means changing from one state to another. So for example, if the current lead source is already selected to "Site Contact Form" before you went to the Edit page to modify the other fields, the trigger will not fire. All three fields must be modified and saved simultaneously in the Edit page for trigger to work.
This automation trigger applies to student with the following field setting:
1. Academy location is "Los Angeles"
2. Paid 2021+ Classes is "Empty"
3. Lead Source is "Site Contact Form"
4. Date of first contact is "Current Week"
5. Initial notes contains the name of the academy they've reached out to
Once the trigger fires, the new lead will receive the email and a follow up call will be automatically scheduled in the CRM. You may track if the new lead has opened/read the email by scrolling to the bottom part of the student's CRM record and view the "Emails" section. To see how this works in real-time, you may create a test record in Zoho CRM and apply the above trigger steps.